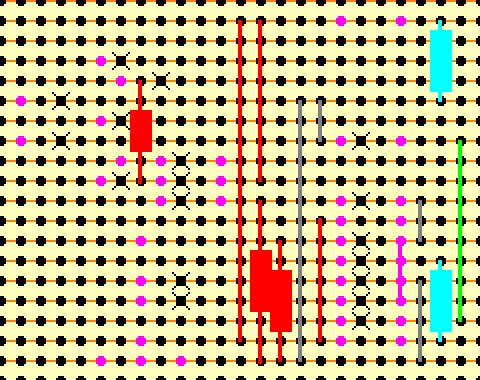
The diagram below shows a representation of a piece of stripboard, viewed from the component side down (so that the copper side is on the bottom):
The crosses represent where the copper track is to be cut. This can be done with a special tool, or 3mm drill. Black circles show unused holes in the stripboard. The red boxes are resistors and the cyan boxes are capacitors. The vertical grey, red and green lines simply show where wires should be soldered between two holes. The purple coloured holes show where PCB pins or PCB sockets are to be soldered. If you are using an 8pin DIL socket, rather than a 6pin PIL socket, for the CNY17, then be careful where this is soldered.
The next diagram has labelling for the components and pins:
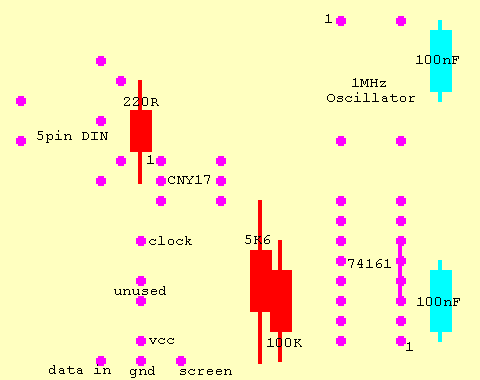
The individual pins on the bottom left of the picture is where the gamelink cable is soldered.
I haven't tested this layout, so there could be bugs, but I've checked it many times and I think it should be OK. Of course send me an email if you have any problems (address at the bottom of the page).